Showing posts with label Refashion. Show all posts

Saturday, May 12, 2012

Vintage Earrings Refashion- Two in One!

I am lucky enough to be in possession of a veritable treasure trove of costume jewelry passed on to me from my grandmother and great grandmother. The venerable ladies had quite a collection of clip-on earrings, which I loved when I was younger and my ears were unpierced.
The Original
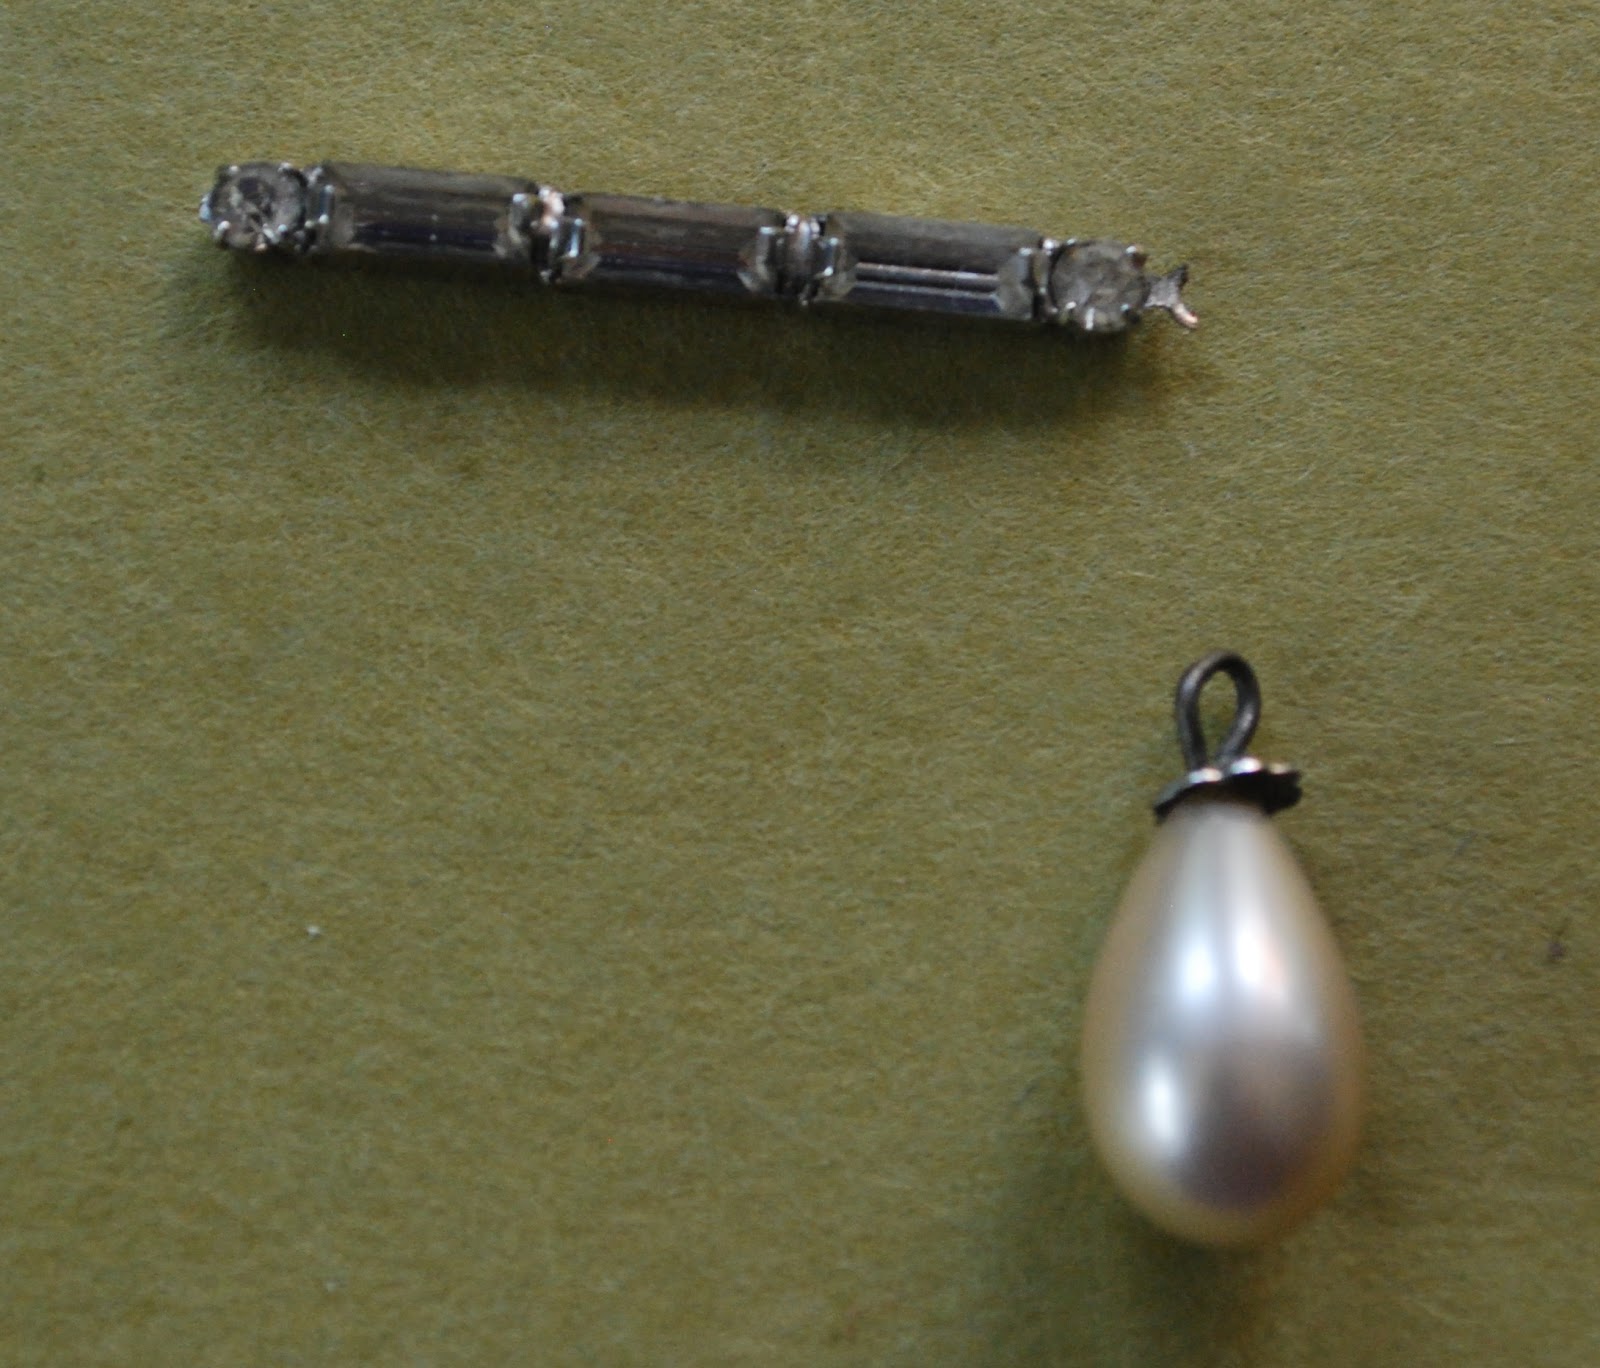
Pawing through the boxes that hold all the costume jewelry, I found one of my favorite pairs of clip-ons. One of the earrings were broken, though, at the point where two pieces were fused together, so it was nothing that a simple jump ring could fix.

The earrings are quite cute, so I decided to convert them into something a little more modern, and that could be worn in my pierced ears. 

Materials
Pliers
Cutters
Earring hooks
Earring posts
Super glue
1. Separate the pearl drop at the bottom by breaking the metal loop that held it. Attach to an earring hook.
2. Cut the charm off the earring back that it was fused to. I had to call in the big guns, and use some huge pliers with cutters on them. My mini starter-kit clippers were no match for these.

3. Put a dab of super glue on the earring post, and press it on to the back of the charm. Hold it there for a minute or two to let the glue set. Let dry for at least an hour before wearing.


I have gotten so many compliments on the studs already, and I love being able to tell people that, actually, I made it!

xo
H

Monday, April 23, 2012

DIY: Navajo Patterned Messenger Bag

I haul my computer, books, and various notebooks with me just about everywhere I go, and sick of digging through my tote the other day to find the right notebook, I decided it was time to pull out my old messenger bag. Before I started taking it with me, though, it needed some jazzing up.

Before: So boring.

After: A fun, Navajo-inspired print.
Front
I wasn't able to find a good pattern online, so I sketched a design onto the canvas with chalk used in sewing to mark fabric, and filled it in with white, yellow, brick red, and turquoise fabric paint. I used Martha Stewart Crafts multi-surface satin acrylic craft paint, and I am pleased with the quality. A bonus: It says it works on wood, glass, and metal as well, so I'll have to try it on some different surfaces! This was such a fun project, because I love painting. 

Back
It took me a few hours over the course of three days. It isn't perfect, but I think it looks great despite the mistakes!

Thursday, April 19, 2012

Monogrammed Moleskine

I'm not exactly sure what it is, (though I suspect my recent addiction to thecollegeprepster.com is the root of the issue) but I have been loving monograms lately. Starting with my sunglasses case post, I have been monograming way too many (and not enough) of my possessions. More monogram projects will be appearing in the future. Anywhoo, this is super similar to the sunnies case refashion.

Materials
Wax pencil/ Grease Pencil (I recommend white for all projects)
Notebook/ Planner
Thin tipped paintbrush
Paint (gold is super classy, but any complimenting colors will be good)


1. Sketch monogram onto cover. Lightly draw lines in to make sure everything is even and centered if you must. Nothing looks cheesier than a off-center paint job.

2. Vary the paintbrush size depending on the thickness of the monogram lines that you want. Make the lines VERY THIN to start with, so that any squiggles can be corrected. Make a stencil using freezer paper and an exacto knife if you're particular, but thats more of a time investment than I was willing to make.

3. Paint over the sketch. Do one coat, let dry and then repeat. If you keep painting over wet paint, the finished results will look streaky and lumpy. If there are any stray wax pencil marks left, use a damp q-tip or an eraser to get rid of them.

TAA DAA! And whammoblammo, now you can be organized AND preppy.

I am THRILLED with the results, and will have no excuse to use such a cute dayplanner now. What do you think? What other items would you like to see monogrammed?

P.S. (Sorry for all the parenthesis. Not sure why I'm doing it, but I can tell it's a problem.)

Thursday, April 12, 2012

Sunglasses Case Refashion

Now that we're getting some sunny days out in the Pacific NW, I've been wearing my Ray-Bans every single time I get behind the wheel. I have severe migraines, so heavy duty sunglasses are a must.

However, the sunglasses case that Ray-Bans come in is snoozeville. I decided to spruce it up with rough stripes with a fun monogram. I grabbed my cheerful yellow paint and went to town. Well, clever ol' me did not think about how yellow stripes on a black case would look, and you can't tell in the photos, but it ended up far too reminiscent of a bumblebee for my taste.

The luck of many DIYs, this one included, is that they can be re-made over and over again! I'm going to leave it as it is for now, but I'm sure this will get a nice makeover the next time I'm bored and feeling crafty.

Anyway, here is a super quick and easy how-to.

Materials
Pencil or wax pencil
Paint
Brush

1. Lightly mark the design onto the case. I did stripes, but chevrons, checks, polka dots, swirls, anything, will look great.

2. Paint one side. Let dry. Paint the other side. Let dry. Repeat, adding coats until you are satisfied with the look.

Now protect your shades in style!


Thursday, April 5, 2012

DIY: Glitter Cap-Toe Ballet Flats

I used to live in my black ballet flats, but after I wore my favorite pair out, the next pair I got wasn't very comfortable, and I only wore them when I had to. I recently came across some old rainbow glitter, and knew right away that it was exactly what I needed to give my flats a new look.

Skirt- Talula c/o Aritzia; Bangles- Nordstrom BP; Bag- Thrifted; Shoes- DIY

My shoes had an extra piece of material on the heel as embellishment, so I glittered that part to make it look even, but I recommend avoiding that if possible. Gravity is not your friend in that case.

Here's the how-to!

1. Mix equal parts Modpodge and glitter in a plastic container. I used a small Tupperware that was missing a lid, but yogurt, sour cream, etc. containers work just as well. 

2. Apply painters tape to the shoe at the point where you want the glitter to end.

3. Using a paint or foam brush, apply the Modpodge/glitter to the shoe. Let dry, and repeat until shoe is covered.

After two coats have dried
Right after third coat was applied
4. Covering the rest of the shoe with plastic, seal the glittered part with a clear varnish.

Tip: Use finer glitter. Mine was big and chunky, and made the texture more bumpy than I anticipated.


These are sure to turn heads, and I love that they can be as formal or casual as desired.